Roof underlayment and lead flashing are two of the most important protective elements in a roofing system. Underlayment sits beneath tiles or slates, while lead flashing seals vulnerable junctions around walls, chimneys, valleys and roof openings.
When either component is damaged or poorly installed, water can enter the roof structure even if the visible tiles still appear to be in reasonable condition. This guide explains how both systems work, common failure points and when repair or replacement may be needed.
What Is Roof Underlayment?
Roof underlayment is the protective layer installed beneath the main roof covering. On pitched roofs, it is commonly known as roofing felt, underlay or breathable membrane.
Its purpose is to provide a second line of defence. If wind-driven rain moves beneath a tile or slate, the underlay helps guide that moisture safely towards the eaves instead of allowing it to reach the loft or ceiling below.
Main functions of roof underlayment
- Secondary waterproof protection
- Reduction of wind-driven rain entry
- Support for moisture and condensation control
- Temporary protection during roof installation
- Additional protection for timber and insulation
What Is Lead Flashing?
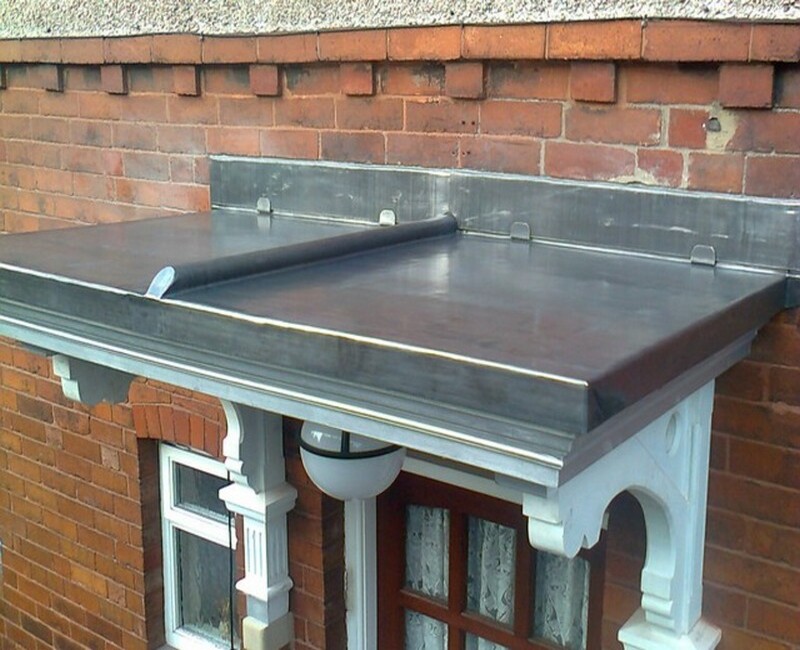
Lead flashing is used to create waterproof junctions where two roof surfaces meet or where the roof connects to a wall, chimney, skylight or parapet.
Lead is particularly suitable for these areas because it can be shaped around complex details and can accommodate movement caused by temperature changes.
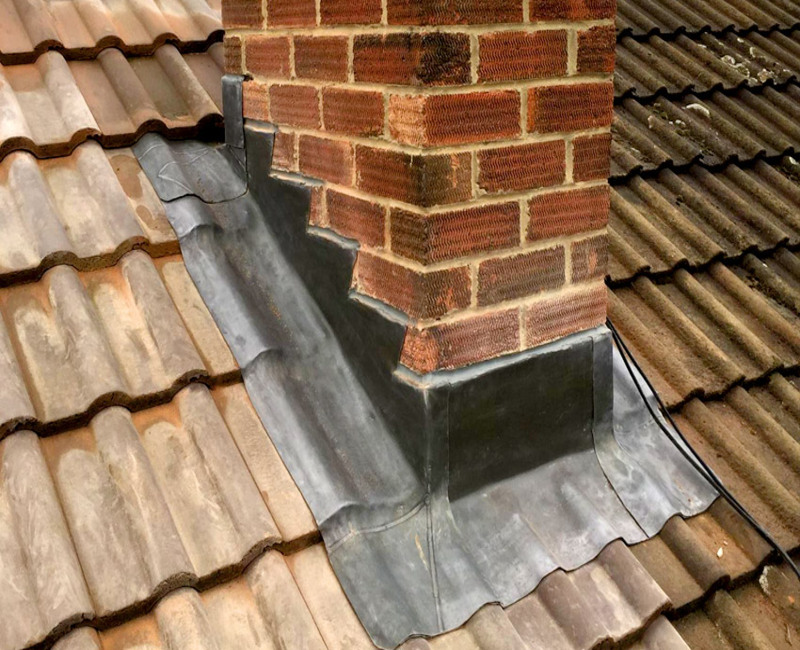
Protects the base and sides of chimney stacks.
Seals the junction between a pitched roof and a wall.
Protects the top edge of roofing membranes and upstands.
Direct water where two roof slopes meet.
Protects the front of chimneys and wall junctions.
Protects exposed wall and roof intersections.
How Underlayment and Lead Flashing Work Together
The roof covering, underlay and flashing should work as one complete water-management system.
Tiles or slates shed most rainfall. If water passes beneath them, the underlay directs it downward. At walls, chimneys and valleys, flashing prevents water from entering behind the roof covering.
Expert tip: Many recurring leaks happen because only the visible surface is repaired. A proper inspection should also check the underlay, battens and flashing around the same area.
Types of Roof Underlayment
| Underlay type | Main feature | Typical use |
|---|---|---|
| Traditional bitumen felt | Heavy and water-resistant | Older and traditional pitched roofs |
| Breathable membrane | Allows controlled vapour movement | Modern roof installations |
| Synthetic underlay | Lightweight and tear-resistant | New roofs and refurbishments |
Why Lead Flashing Fails
- Poor installation or insufficient laps
- Cracked or missing mortar pointing
- Thermal movement over time
- Incorrect fixing into brickwork
- Lead cut into pieces that are too long
- Storm damage or movement of surrounding materials
- Previous repairs using sealant instead of proper flashing
Why Roof Underlayment Fails
- Age and brittleness
- Tears around nails or staples
- Rotten or damaged battens
- Poor overlap between membrane sheets
- Condensation and trapped moisture
- Damage during previous roofing work
- Animal or pest activity
Warning Signs of Damage
Marks on ceilings or walls may indicate hidden water entry.
Often linked to failed flashing or pointing.
May indicate damaged underlay beneath the roof covering.
Creates an open path for rainwater.
Old underlay may crack or tear around fixings.
Repeated patching may not address the real source.
Repair or Replace?
| Problem | Repair may be suitable | Replacement may be better |
|---|---|---|
| Loose flashing edge | Yes | No |
| Small local crack | Yes | No |
| Split or heavily fatigued lead | Sometimes | Often |
| Missing flashing | No | Yes |
| One local underlay tear | Sometimes | No |
| Widespread brittle felt | No | Yes |
| Rotten battens and damp timber | No | Yes |
Chimney Flashing and Pointing
Chimneys are among the most common sources of roof leaks because they interrupt the roof covering and are exposed to wind and rain from every direction.
A reliable chimney detail usually includes step flashing, cover flashing and an apron. The surrounding mortar and brickwork should also be sound.
Lead Valleys and Roof Junctions
Valleys carry large volumes of water where two roof slopes meet. If the lining is cracked, blocked or incorrectly supported, leaks can occur quickly.
Valleys should remain clear of leaves, moss and debris, and the surrounding tiles should be properly cut and fixed.
Real Project Spotlight
Failed Underlay and Lead Flashing Around a Wall Junction
During a recent roof inspection, water was entering near a rear wall junction. The visible tiles looked mostly intact, but the lead flashing had separated from the brickwork and the old underlay beneath the tiles was brittle.
The correct repair involved lifting the affected tiles, replacing the damaged underlay and battens, and installing new leadwork with proper laps and fixing. This addressed both the visible defect and the hidden water path.
Common Repair Mistakes
- Applying sealant over split lead
- Ignoring damaged underlay beneath tiles
- Replacing tiles without checking battens
- Using insufficient flashing laps
- Leaving cracks in mortar pointing
- Failing to clear valleys and drainage paths
- Repairing the internal ceiling before stopping the roof leak
What Should a Professional Inspection Include?
- Check tiles, slates and roof edges.
- Inspect lead flashing around chimneys and walls.
- Look for cracks in mortar and pointing.
- Check underlay condition where access is possible.
- Inspect battens and timber for damp or rot.
- Check valleys, gutters and outlets.
- Identify the full path of water entry before recommending work.
Why Choose Sparkling Roofing?
Sparkling Roofing Ltd provides roof inspections, lead flashing repairs, underlay replacement and roof repair services across London.
- Lead flashing and chimney repair experience
- Roof felt and membrane replacement
- Tile, slate and batten repairs
- Clear quotations before work starts
- Service across London and surrounding areas
Explore our Roof Repairs London, Flat Roofing London, Roofing Services Putney and Roofing Services Wimbledon pages.
Frequently Asked Questions
Request a Roof Inspection
Tell us about your roof and we will help you identify whether the underlay, flashing or surrounding roof details need repair or replacement.